User Guide
-
Introduction
This website is provided as a service to partner developers who do not have actual appliance devices.
Developers can test their applications using Cloud APIs and our simulator, which acts as a virtual device.
- - URL
- https://simulator.cspserver.net/
- - Cloud API
-
You can also use Smart Home Cloud APIs for virtual devices.
https://simulator.cspserver.net/api/*(refer to Samsung Smart Home Cloud API Specification.pdf)
- - Environment
-
Web Browser : Chrome, Opera, Firefox, Safari, IE8 or above (Recommended)
Display : Screen width > 1024 (Recommended)
-
Registration
To use this service, you must be a registered member of Samsung Account and also registered as a Partner.
If you are not a partner, you may request for partnership at http://developer.samsung.com/smart-home.
-
Menus
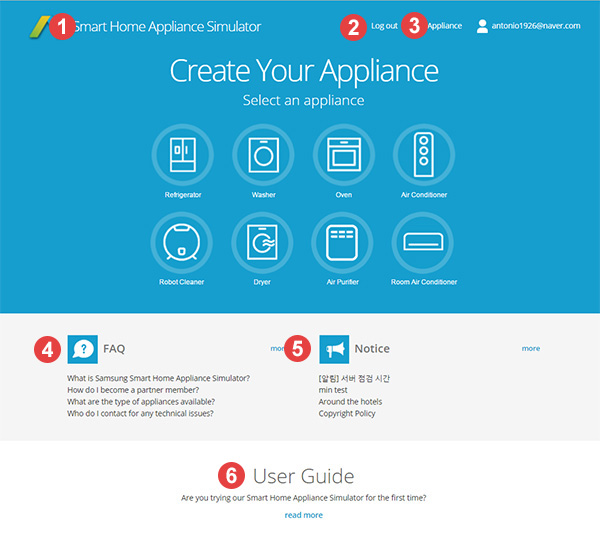
- 1) Smart Home Appliance Simulator : This logo acts as a home button. Click here wherever you are to come back to the main page.
- 2) Log in / Log out : Log in to start your experience with Smart Home Appliance Simulator
- 3) My Appliance : This menu will appear once you have created at least one appliance. This is where you can test your application with our simulators.
- 4) FAQ : Here are some frequently asked questions. If you have any questions, try our FAQ for answers.
- 5) Notice : Any announcements or information regarding the simulator website will be posted here for your reference.
- 6) User Guide : If you are using the simulator for the first time, review the User Guide on how to use our website.
-
Add Virtual Device

You can create a virtual device in a couple of ways.
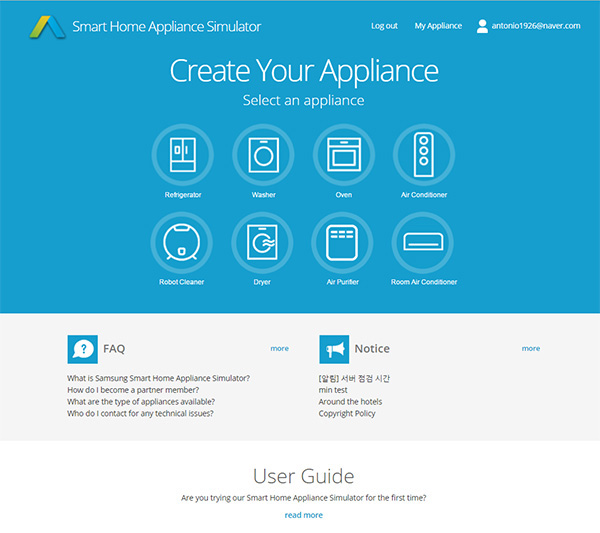
When you are creating a virtual device for the very first time, you will start at the main page.
- 1) Select an appliance you wish to create and click.
- 2) Enter a device name and create.
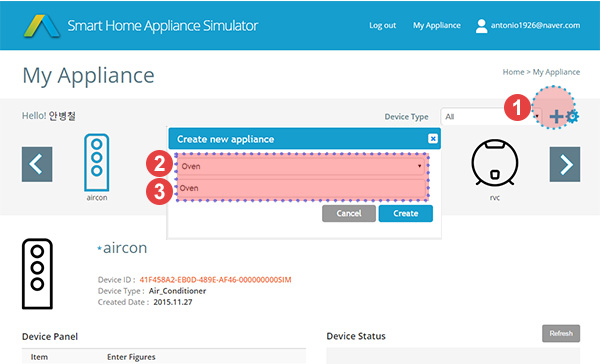
When you have at least one created device, you will be directed to the My Appliance page.
- 1) Click on the Plus button.
- 2) Select the type of appliance you wish to create.
- 3) Enter a device name and create.
-
Manage Virtual Device
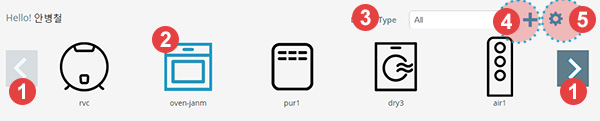

You will be able to manage all of your virtual devices from this device dashboard.
- 1) Use the navigation buttons to see more created devices.
- 2) The device you are working on currently will be highlighted.
- 3) You can filter the devices by Device Type for easier viewing.
- 4) Click on the Add button to create a new virtual device.
- 5) Click on the Settings button to edit your devices.
To edit your devices, first click on the Settings button.
- 1) To delete a device, click on the delete button of the device you wish to delete (*delete cannot be undone)
- 2) To edit the name of a device, click on the edit button of the device you wish to edit.
Once an edit box appears, revise the name in the edit box and click the save button. - 3) To cancel making changes, click on the return button (*delete cannot be undone)
-
Query Device
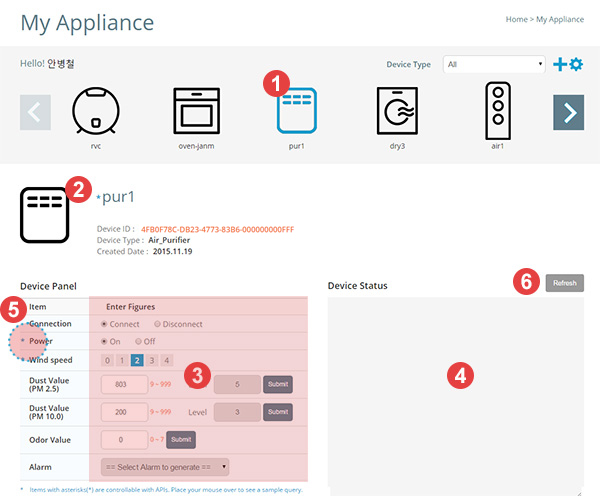
- 1) Select a device to query.
- 2) Information on selected device is shown here.
- 3) On the Device Panel, enter figures for any of the functions you wish to query.
The query results will be shown as either success or failure on your screen for about 1 second. - 4) The queried status will be shown in the Device Status area
- 5) Items with asterisks(*) are controllable with APIs. Place your mouse over to see a sample query.
- 6) Click the refresh button to display the latest sever data on the Device Panel and Device Status.
- Notification
You can get notification as a response to the command that you input to a device on the simulator.
To register for receiving notification, please enter your Callback URI on the developer website.
- 1) Call POST subscriptions API to the simulator server.
- 2) Query(Control) your device on the Device Panel on the simulator.
- 3) The simulator server will send the result to your Callback URI, along with notification payload.
ex) POST https://simulator.cspserver.net/api/subscriptions
{ "Subscriptions": ["12345678-ABCD-0000-0000-000000000FFF"] }ex) Set Power to Off
     {
   	  "Notification": {
	   	"Events": [{
		   	"id": "12345678-ABCD-0000-0000-000000000FFF",
		   	"resource": "Operation",
		   	"eventTime": "2015-09-15T01:49:01",
		   	"eventTimeUTC": "2015-09-15T01:49:01+00:00",
		   	"event": "Notified",
		   	"Operation": {
		   		"power": "Off"
		   	}
	   	}]
 	  }
}
Please refer to Samsung Smart Home Cloud API Specification.pdf for details about Subscription and Notification.
-
Contacts
For any inquiries on this site or about our partnership, please contact us at Partner.api@samsung.com.